How to Choose the Best Sound Treatment for Your Home Studio
Creating the ideal sound environment in your home studio requires careful consideration of sound treatment. Renowned audio engineer Emily Hart once said, "The right sound treatment turns a room into a professional space." This highlights the importance of investing time and resources into proper sound treatment solutions.
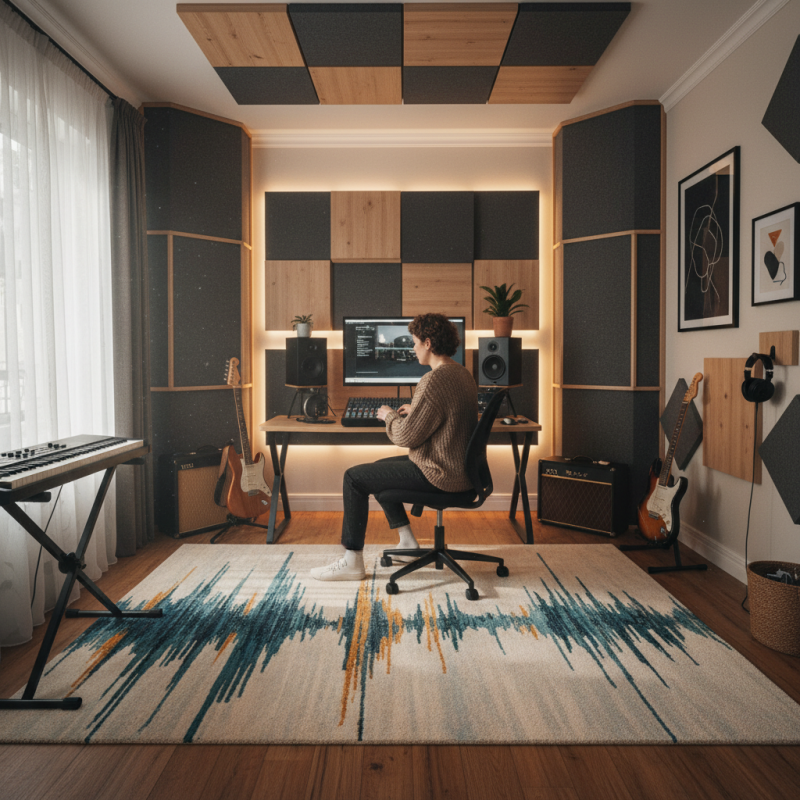
Choosing the best sound treatment can be daunting. Many overlook the aesthetic aspects of their studio. Sound panels or bass traps might clash with personal taste. However, finding visually pleasing options can enhance both sound quality and the overall ambiance. It's crucial to balance function and form.
Additionally, not every room has the same acoustic challenges. A basic understanding of your space is necessary. Reflections, echoes, and background noise can create issues that are difficult to detect initially. You may install sound treatment but still face problems. Continuous evaluation and adjustment are key. Embracing this process can lead to tailored solutions that truly meet your needs.
Understanding the Importance of Sound Treatment in Home Studios
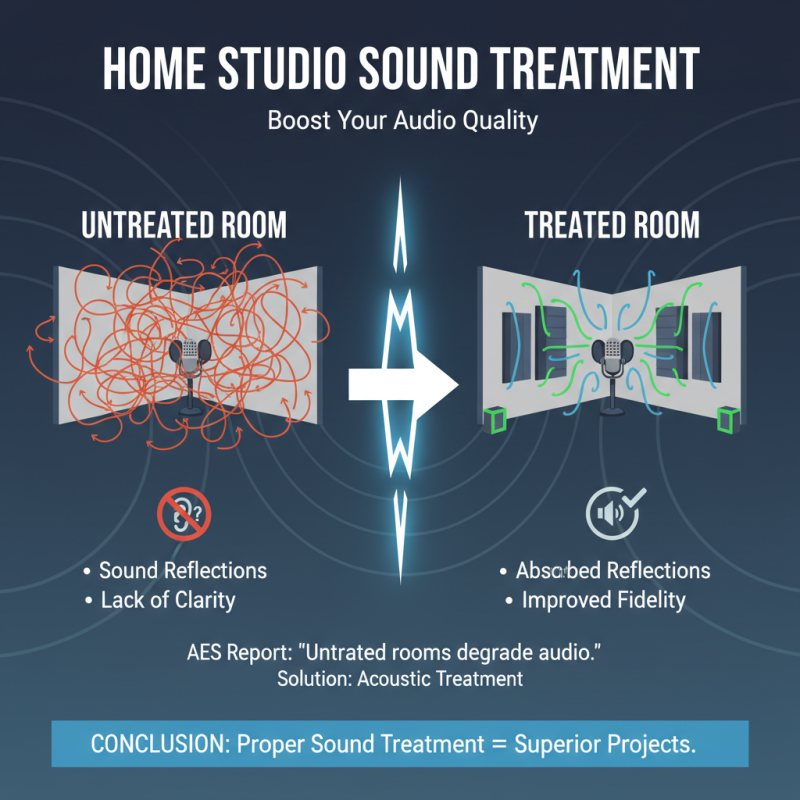
Creating a well-treated sound environment in your home studio is crucial. Many studies show that proper sound treatment can improve audio quality dramatically. According to a report by the Audio Engineering Society, untreated rooms can reflect sound in unpredictable ways, leading to a lack of clarity. This can diminish your project’s overall quality.
Effective sound treatment helps control reflections and absorbs excess noise. It creates a balanced audio space. Acoustic panels, bass traps, and diffusers are essential elements. A report by the Journal of the Acoustical Society reveals that spaces with effective sound treatment can achieve up to a 50% reduction in unwanted echoes. This fosters a more accurate listening environment.
Tips: Consider your room dimensions. Smaller rooms often suffer from poor acoustics. Evaluate where sound waves interact most. Experiment with placement. Start with DIY solutions if budgets are tight. Many resources are available for creating affordable sound treatment options. Just remember, strive for improvement, not perfection. Every studio has unique challenges. Embrace them as part of your creative journey.
Identifying Common Sound Issues in Home Recording Environments
Identifying common sound issues in home recording environments is crucial for effective sound treatment. Many home studios suffer from echoes and flutter echoes. These occur when sound waves bounce off hard surfaces. You might notice a hollow sound, especially during vocal recordings. This can be distracting and hinder the quality of your music.
Another frequent issue is background noise. In a home setting, this can stem from appliances or outside traffic. These noises can creep into your recordings. They often go unnoticed during monitoring but are glaringly obvious upon playback. Soundproofing is not always the answer. Instead, using high-density materials strategically can help absorb these unwanted sounds.
Room shape and size also play vital roles. Irregular rooms can create dead spots and peaks in sound. If your room has bare walls and a hard floor, you may struggle with uneven sound distribution. Experimenting with furniture placement and additional soft furnishings could provide immediate improvements. Each recording environment is unique. Identifying these issues requires patience and a keen ear. Sound treatment is not just a task; it’s an ongoing learning process.
Evaluating Different Types of Sound Treatment Materials and Their Uses
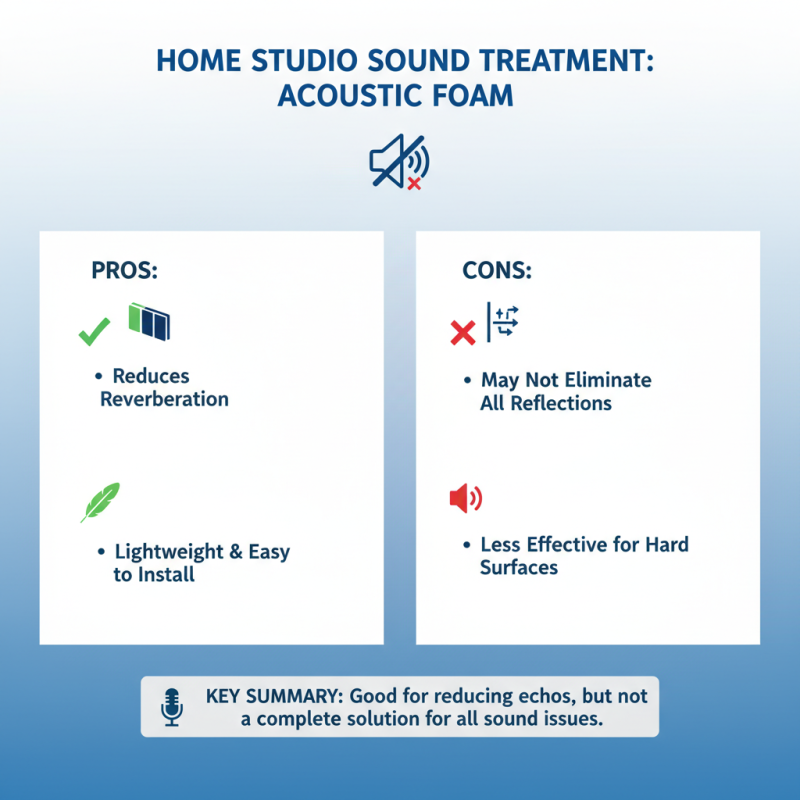
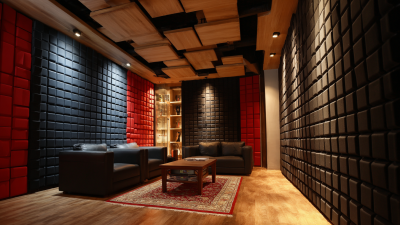
Choosing the right sound treatment for your home studio can feel overwhelming. There are various materials available, each serving a unique purpose. Acoustic foam is popular for its ability to reduce reverb. It’s lightweight and easy to install. However, it may not eliminate all sound issues. Reflection from hard surfaces can remain, making it less effective for some spaces.
Another option is bass traps. These are crucial for controlling low-frequency sounds. Placing them in corners can help absorb excessive bass. But they can be bulky and may change the room's aesthetic. Using them requires a careful balance between sound quality and design. Additionally, soundproofing curtains are practical. They don’t block sound entirely but can reduce outside noise. They offer flexibility, but their effectiveness varies depending on thickness and material.
When evaluating any sound treatment, consider your specific needs. Not every material works for every room. Experimentation may lead to unexpected results. You might find that what seems ideal lacks the desired effects. Each studio is unique, and sound dynamics will change based on layout and purpose. A thoughtful approach is essential.
Strategies for Designing an Effective Acoustic Treatment Plan
Creating an effective acoustic treatment plan for your home studio is essential. Poor acoustics can impede your sound quality significantly. Studies show that untreated rooms can have sound reflections peaking at 15-20 ms. This delay affects clarity. You want your acoustics to be tight and even.
Begin by assessing your space. Measure room dimensions and identify reflective surfaces. Hard surfaces may bounce sound, creating echoes. Consider using foam panels, bass traps, and diffusers. They help control reverberation. Notably, bass frequencies require more attention; they are often uneven. Aim for a balanced sound field across all frequencies.
**Tip:** Place acoustic panels at first reflection points. This reduces echoing. Use your ears, but also consider starting with online calculators available for room treatment. They can provide a rough estimate of what you need.
Don’t overlook the power of floor treatment. Carpeting can absorb sound too. Additionally, think about furniture placement. A cluttered space can hinder sound flow. If it feels chaotic, it may not sound good either.
**Tip:** Regularly reassess your treatment plan. As your studio evolves, your needs may change. Stay flexible and make adjustments.
How to Choose the Best Sound Treatment for Your Home Studio - Strategies for Designing an Effective Acoustic Treatment Plan
| Acoustic Treatment Type |
Purpose |
Material |
Installation Location |
Estimated Cost |
| Foam Panels |
Sound Absorption |
Polyurethane Foam |
Walls |
$100 - $300 |
| Bass Traps |
Low Frequency Control |
Rockwool / Fiberglass |
Corners |
$150 - $400 |
| Diffusers |
Sound Reflection Control |
Wood or Plastic |
Walls |
$200 - $500 |
| Acoustic Curtains |
Sound Absorption |
Heavy Fabric |
Windows / Doors |
$50 - $200 |
| Isolation Pads |
Vibration Control |
Foam / Rubber |
Under Speakers |
$30 - $100 |
Implementing Soundproofing Techniques to Enhance Studio Performance
Soundproofing is vital for any home studio. It minimizes noise distractions and improves audio quality. According to a study by the Acoustic Society of America, sound treatment can enhance clarity by up to 40%. This is crucial for musicians and producers who rely on precision.
Implementing soundproofing techniques involves various strategies. Adding acoustic panels can significantly reduce echo. These panels absorb sound waves, creating a balanced sound environment. The positioning of furniture also helps; placing bookshelves filled with books can act as a diffuser. These simple changes can make a noticeable difference in recording quality.
But, challenges arise. Not all materials provide equal effectiveness. Sometimes, budget constraints limit options. Rolling off bass frequencies may leave some sound issues unresolved. Therefore, listening tests are essential. Regularly assess the studio's sound performance to identify areas needing improvement. Adapting to these reflections can enhance your sound treatment strategy.